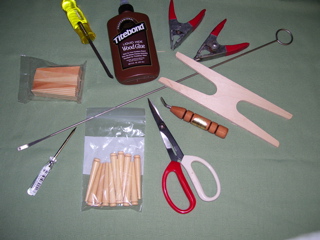
|
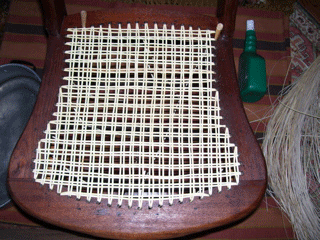
Photo #1 By counting outward to the center I realized I was about to weave a seat with two center holes.
So,here are the step by step photos for you to follow along.
I hope they will give you a better understanding of how to choose the correct holes during the Basic 7 Steps of Strand Hand Caning.
|
 |
|
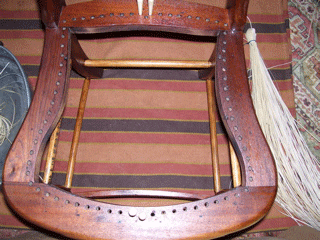
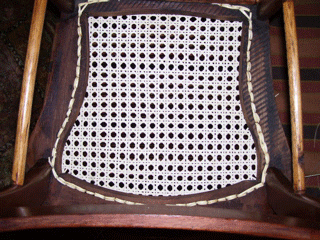
Photo #2 Step #1 Even with the two center holes this chair has been drilled very nicely. I was able to match left filler verticals to the right vertical fillers. Fillers are those verticals put in after filling in the back "north" rail.
|
 |
|
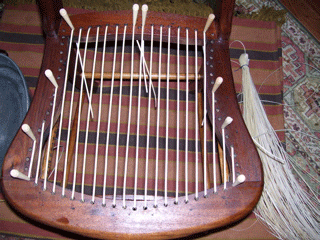
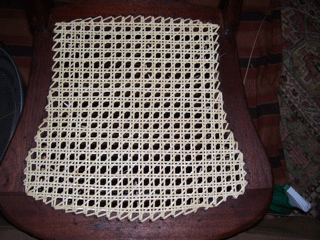
Photo #3 Step #2 At the end of this weaving, note that the rule to ignore( do not use) corner holes until Step 5 had to be broken. The top back “north” corner holes have been used. And between the front “south” rail seams, all the holes were chosen. Having equally spaced grids for good eye appeal wins on this seat.
|
 |
|
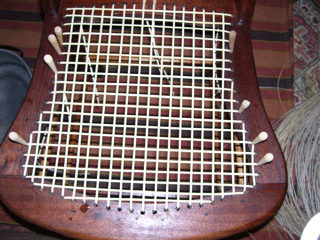
Photo #4 Steps #3 & #4. Complete through Step #4. However, notice I changed my mind on the two most “south” horizontals. I moved one down & took out the other. Better spacing. Better eye appeal.
|
 |
|
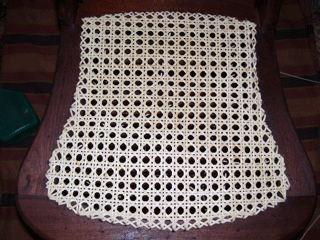
Photo #5 Step #5 First diagonal completed. Can you spot the fish heads? There are 3 on the right ”east” rail and 3 along the lower SW, left rail curve. Remember, fish heads are tucks on curves. Two parallell strands, woven during the same diagonal step, ending in the same rail hole. See if I am able to balance them out during the next Step 6.
Also are you seeing the first half of the “x” created along the entire rail? Your last draw before you go into a rail hole-should be supporting the corner of the last grid-- just as you have been automatically doing in the center of the seat.
|
 |
|
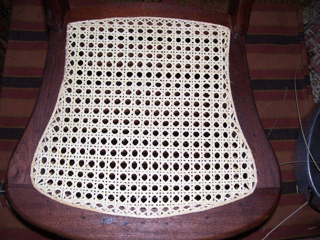
Photo #6 Step #6 All the fish heads are balanced. There is one on the left on the same horizontal row as on the right--EXCEPT one more was created on the SE right rail, 3rd horizontal up. For as good as this seat was drilled, there was a bit more curve in this spot. Required another “tuck” AND the finished ”x”s have popped nicely.
|
 |
|
Photo #7 Binder is in, the chair is complete. I like to miter in my binder on right angled corners, rather than peg.
|
 |
| Photo #8 The underside. A good caner is known by the correctly woven “x” & fish head--PLUS neat tie offs underneath. Use long ends still hanging from weaving to bind the binder strip where possible. You only need to knot a strand that has movement when you push up on it after Step 6. Others can be clipped and tucked securely into the nearest under hole. |
 |